DIY Horizontal Porch Railing: A Modern Touch to Your Outdoor Space
Adding a horizontal porch railing can dramatically transform the look of your home, giving it a modern and sophisticated appeal. While professional installation is always an option, undertaking a DIY horizontal porch railing project can be a rewarding experience, saving you money and allowing you to customize the design to perfectly match your aesthetic. This guide provides a comprehensive overview of how to build your own DIY horizontal porch railing, from planning and material selection to construction and finishing.
Why Choose a Horizontal Porch Railing?
Before diving into the how-to, let’s explore why horizontal railings are gaining popularity:
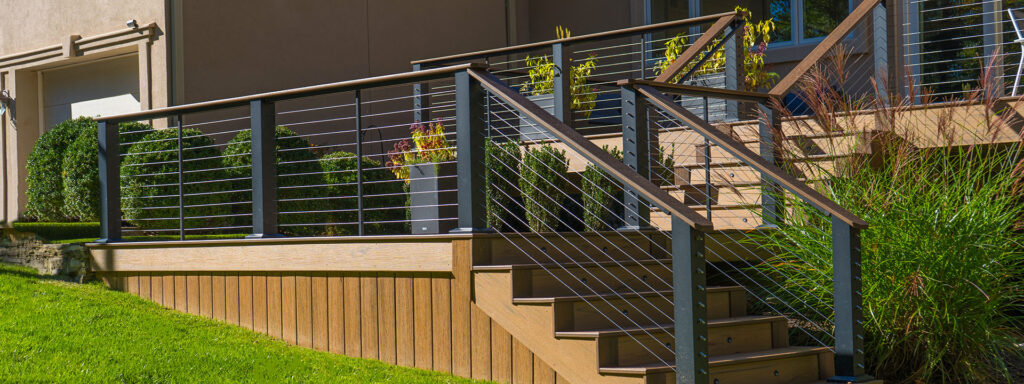
- Modern Aesthetics: Horizontal lines create a clean, contemporary look that complements various architectural styles.
- Enhanced Views: Compared to traditional vertical railings, horizontal designs often provide less obstructed views of your surroundings.
- Perceived Spaciousness: The horizontal orientation can make your porch feel wider and more open.
- Customization: DIY horizontal porch railing projects allow for a high degree of customization in terms of materials, spacing, and overall design.
Planning Your DIY Horizontal Porch Railing Project
Careful planning is crucial for a successful DIY horizontal porch railing project. Here’s what you need to consider:
Building Codes and Regulations
Always start by checking your local building codes and regulations. These codes specify minimum railing heights, spacing between horizontal rails (typically no more than 4 inches to prevent children from climbing through), and required structural integrity. Ignoring these regulations can lead to costly rework and potential safety hazards. Failure to comply with local building codes might result in fines or necessitate the complete removal of your newly constructed DIY horizontal porch railing.
Measurements and Layout
Accurate measurements are essential. Measure the total length of the railing required, as well as the height from the porch floor to the desired top of the railing. Determine the number of posts you’ll need, spacing them evenly along the length of the porch. A common spacing is between 6 and 8 feet, but this may vary depending on the material and design. Sketch out your design, noting all measurements and post locations. This visual representation will be invaluable during the construction process. When designing your DIY horizontal porch railing, consider the overall aesthetic of your home and how the railing will integrate with existing features.
Material Selection
Choosing the right materials is key to the longevity and appearance of your DIY horizontal porch railing. Common options include:
- Wood: A classic choice offering warmth and versatility. Cedar, redwood, and pressure-treated lumber are popular for their weather resistance.
- Metal: Provides a sleek, modern look and is known for its durability. Aluminum and steel are common choices.
- Composite: A low-maintenance option that mimics the look of wood without the risk of rotting or warping.
- Cable Railing: Offers minimal obstruction of views and a contemporary aesthetic. Requires specialized hardware and tensioning systems.
Consider the climate in your area when selecting materials. For example, if you live in a region with high humidity, composite or metal may be better choices than wood. Factor in the cost of each material, as well as the ease of working with it. Wood is generally easier to cut and fasten than metal, but it requires more maintenance. The material you choose for your DIY horizontal porch railing will significantly impact both its appearance and longevity.
Tools and Materials List
Before starting construction, gather all the necessary tools and materials. This will streamline the process and prevent frustrating delays. Here’s a comprehensive list:
Tools
- Measuring tape
- Level
- Circular saw or miter saw
- Drill/driver
- Screws and/or nails
- Safety glasses
- Work gloves
- Post-hole digger (if installing new posts)
- Concrete mix (if installing new posts)
- Clamps
- Sander
Materials
- Posts (4×4 or 6×6, depending on the design)
- Horizontal railing boards (2×4 or 2×6, depending on the design)
- Post caps
- Fasteners (screws, nails, or bolts)
- Wood filler (if using wood)
- Primer and paint or stain (if using wood)
- Concrete mix (if installing new posts)
- Shims
Step-by-Step Construction Guide for Your DIY Horizontal Porch Railing
Now, let’s get to the construction phase of your DIY horizontal porch railing. Follow these steps for a structurally sound and aesthetically pleasing result:
Installing the Posts
If you’re replacing existing posts, carefully remove them. If you’re installing new posts, dig holes that are deep enough to extend below the frost line in your area (this prevents the posts from heaving due to freezing and thawing). Set the posts in the holes and pour concrete around them, ensuring they are plumb (perfectly vertical). Use a level to check the plumbness from multiple angles. Allow the concrete to cure completely before proceeding. Proper post installation is crucial for the stability of your DIY horizontal porch railing.
Attaching the Horizontal Rails
Once the posts are securely in place, you can begin attaching the horizontal rails. Start with the top rail, positioning it at the desired height. Use a level to ensure it’s perfectly horizontal. Secure the rail to the posts using screws or bolts. Repeat this process for the remaining rails, maintaining consistent spacing between them. Remember to adhere to local building codes regarding maximum spacing between rails. Clamps can be helpful for holding the rails in place while you fasten them. The precise placement of the horizontal rails is key to achieving the desired aesthetic for your DIY horizontal porch railing.
Finishing Touches
After the rails are installed, inspect the entire structure for any imperfections. Fill any nail holes or screw holes with wood filler (if using wood). Sand the entire railing to create a smooth surface. Apply primer and paint or stain to protect the wood from the elements and enhance its appearance. Consider adding post caps for a finished look. A well-executed finish will significantly enhance the visual appeal and longevity of your DIY horizontal porch railing.
Safety Considerations
Safety should always be a top priority when undertaking any DIY horizontal porch railing project. Wear safety glasses and work gloves at all times. Use caution when operating power tools. If you’re working at heights, use a stable ladder or scaffolding. If you’re unsure about any aspect of the project, consult with a professional contractor. Always prioritize safety to prevent accidents and injuries during your DIY horizontal porch railing construction.
Maintenance Tips
To keep your DIY horizontal porch railing looking its best, regular maintenance is essential. For wood railings, inspect the finish annually and reapply paint or stain as needed. Clean the railing regularly with soap and water to remove dirt and debris. For metal railings, check for rust and corrosion and treat any affected areas promptly. For composite railings, simply wash them with soap and water. Proper maintenance will extend the life of your DIY horizontal porch railing and keep it looking beautiful for years to come.
Troubleshooting Common Issues
Even with careful planning, you may encounter some challenges during your DIY horizontal porch railing project. Here are some common issues and how to address them:
- Posts are not plumb: Use shims to adjust the posts until they are perfectly vertical before pouring concrete.
- Rails are not level: Use a level to ensure the rails are perfectly horizontal before fastening them to the posts.
- Gaps between rails and posts: Use wood filler to fill any gaps and create a seamless look.
- Fasteners are visible: Use countersinking drill bits to recess the fasteners and then fill the holes with wood filler.
Cost Analysis
The cost of a DIY horizontal porch railing project will vary depending on the materials you choose, the size of your porch, and your existing skill level. However, it’s generally significantly less expensive than hiring a professional contractor. Wood railings are typically the most affordable option, while metal and composite railings are more expensive. Consider the long-term cost of maintenance when comparing different materials. While some materials may have a higher initial cost, they may require less maintenance over time, saving you money in the long run.
Conclusion
Building a DIY horizontal porch railing is a challenging but rewarding project that can significantly enhance the curb appeal of your home. By following these steps and taking the necessary precautions, you can create a beautiful and functional railing that you’ll be proud of for years to come. Remember to prioritize safety, adhere to local building codes, and choose materials that are appropriate for your climate and budget. With careful planning and execution, your DIY horizontal porch railing will be a valuable addition to your outdoor space. The clean lines and modern aesthetic of a DIY horizontal porch railing can transform your porch into a welcoming and stylish area for relaxation and entertaining. [See also: Deck Railing Ideas for Small Spaces]
